
Hangboarding strikes me as hard for a couple of reasons, the first of which is, where in the heck do I hang it?!
As always, I’m going to be completely honest — I have had a hangboard sitting untouched in the back of my closet for years.
It has moved from one apartment to the next and I got around to hanging it up and using it because I’m a total novice when it comes to any kind of at-home DIY. Putting an electric drill in my hands can only end in disaster.
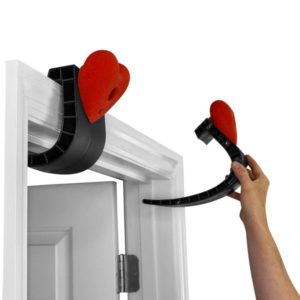
Then one day, @rockclimbingwomen introduced me to the Porta Hang. Suddenly all my hangboard problems were solved.
With a compact setup that needs only a door frame, the Porta Hang can go with me anywhere and no power tools are required!
With at least one hurdle to using a hangboard removed, I got really excited about figuring out what I could do with a hangboard.
Just looking at a hangboard can be intimidating and when I tried to see what I was physically capable of, my first impression was: not much.
Hangboards are excellent for improving upper body, finger, and grip strength for both indoor and outdoor climbers but, like anything else, it’s important to listen to your body and take a path that allows you to build your strength over time while preventing injury.
Four great hangboard exercises
1. Scapular Pull-ups
While you are going to begin in a pull-up position with your palms facing away and shoulder-width apart, these scapular pull-ups are not your middle school P.E. pull-ups!
You will maintain straight arms and an open hand grip as you hang from your pull-up bar or hangboard jugs.
Bring your shoulder blades together and as you do so, feel your head move backward and your chest open up.
Aim for two sets of 6 to 12 repetitions with a 3-minute rest in between. Once you feel like you’ve got this, you can add another repetition.
Don’t forget though, that getting stronger is a long-term, ongoing goal.
It is also a great idea to start off with a little less resistance and in this case, that would be starting in a position where your feet are on the floor or supported on a chair or stool so that a bend in your knees gives you the right ratio of challenge and support.

2. 10-Second Hang
This one is pretty self-explanatory — make sure your shoulders are down and away from your ears as you utilize a half crimp hand position and hang for 10 seconds with a 30-second rest afterward.
In a half crimp hold, you will place your hands on the hold, bend your fingers at the second joint, and allow your thumb to stay in a natural position, resting alongside your index finger.
3. Reverse Pull-ups
There I go with that dirty word again! Never fear — this one also bears no resemblance to the torture of your P.E. years.
Starting off on the jugs of your hangboard or on a pull-up bar, grab a chair to stand on and use an open hand grip as you put yourself in the position you would be in at the top of a pull-up.
Then, slowly lower yourself for 5 seconds. Aim for 5 sets but stop if you can no longer control lowering off.
4. Knee Raises
Again, utilizing your hang board’s jugs and an open hand grip, you are going to bring your knees to your chest as you exhale and inhale as you lower your knees.
Be mindful that your shoulders are down and away from your ears and go for 10 repetitions.
Additional Hangboard Tips
Hangboard workouts can be pretty intense on your finger joints and tendons, consider 1–2 days of rest in between your hangboard workout.
Some combinations of hangboarding and climbing might look like 1–2 days of hangboard and 1–2 days of climbing in a week or 3 days of climbing and 1 day of hangboarding in a week.
For more on building grip strength and types of grips, check out our series on grip strength training!

Jenny Nichols got her climbing start in Flagstaff, AZ in 2007. Today she lives in Seattle, WA where she works as a K-12 teacher. While she also dabbles in mountain biking, hiking, and kayaking, her passion is to combine climbing and international travel. To date she has climbed in thirteen different countries. She’s currently also learning how to woman a sailboat.