
If you’ve been tuning in for our other articles about how to improve grip strength by adding stretching and warm-ups to your climbing and training sessions as well as grip strength exercises that you can do at home or in the weight room, you might have been feeling like you’d be spending more time training and warming up for climbing than ever actually climbing.
Never fear, I am here to deliver one more installment of our How to Increase Grip Strength series and it finally involves actual climbing!
Some of us love bouldering and some of us are inwardly (or outwardly) groaning right now, but hear me out.
In his book Training for Climbing: The Definitive Guide to Improving Your Performance, Eric Hӧrst of trainingforclimbing.com identifies bouldering as “the most straightforward way to train grip strength” because it “allows you to focus on climbing the hardest moves possible.”
It is hard to achieve this high level of focus in roped climbing because routes are often a mix of different kinds of holds. While mixing it up on longer routes increases your forearm strength and has the bonus of being fun and thought provoking, it is not ideal for training your grip strength.
If you want to increase your grip strength, you’ll need to train on specific grip positions. Hӧrst encourages climbers to focus on 6 different grip positions: the half/open crimps, open hand, wide pinch, and three 2-finger pocket positions.
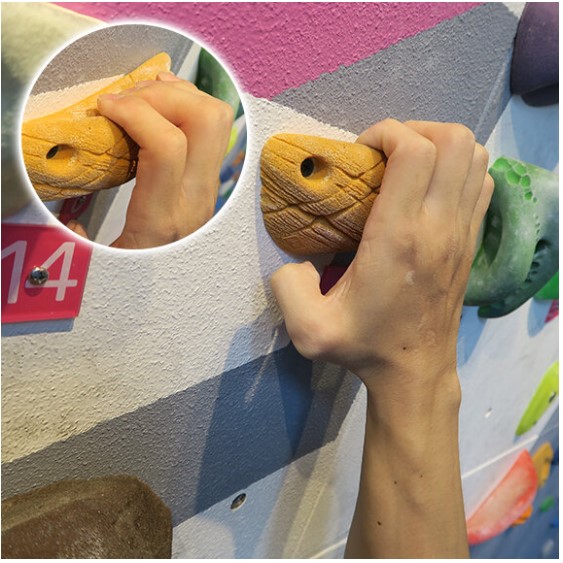
- Half/Open Crimps

Image Source Unlike a full crimp where you lock your thumb over the top of your index finger, the half and open crimp positions ask you to trust your crimp strength with your thumb flying free. Excluding your thumb as you crimp puts less stress on your joints and tendons.In a half crimp your other four fingers are lining up on the crimp while in an open crimp your two middle fingers are crimping while your shorter ring and pinky fingers are in an extended open-hand grip.
- Open Hand
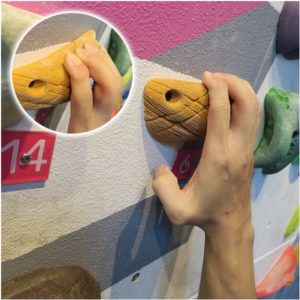
Image Source This grip position feels super insecure BUT is way less stressful on your joints and tendons, making it a great warm-up grip position to do before you get into your crimps. In this grip position, your fingers are stretched out (not crimping) and your middle knuckle is straight. Simultaneously your mortal enemy and the one thing most likely to help you send your project, this position is key to a stronger grip.
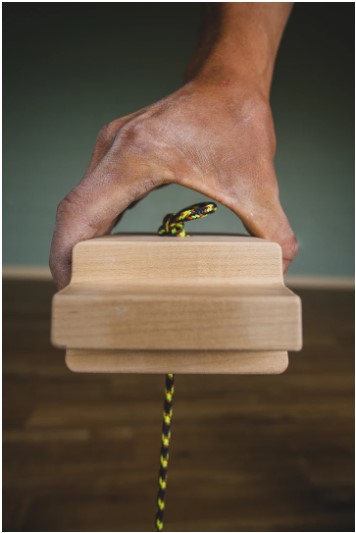
- Wide Pinch
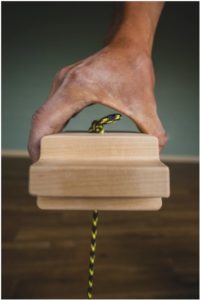
Image Source Take that good grip you’ve developed with all those plate pinches to the next level by now hanging your body from it. Select pinch holds that require your fingers to extend into an open-hand position with an over-extended wrist and you’ll be training to make those protruding holds such as pebbles, tuffas, aretes, and opposing edges feel like heaven when your project throws them at you.
- Pockets
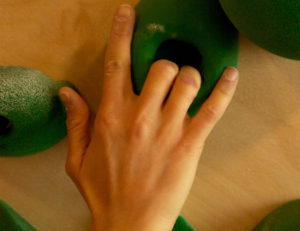
Image Source This is actually three grips in one. Pockets require the same extended fingers as the open hand grip but instead of using all of your fingers, you’ll train your fingers in their three different pairs (index and middle fingers, middles and ring fingers, ring and pinky fingers).

Now that you know what grip positions you are looking for on the bouldering wall, here are Hӧrst’s suggestions for utilizing bouldering to increase grip strength:
- Select a short bouldering problem that appears to isolate a specific grip position. Ideally, you should be able to climb the route in under 15 seconds.
- The bouldering route needs to be difficult enough to bring you to near failure, as in almost…can’t…hold…on…
- Three attempts with a 2-3 minute rest in between equals one set.
- Boulder in this manner for 30-60 minutes so that you are cycling through three to ten sets of different grip positions.
If you want to delve deeper into the mechanics of how and why to build your grip strength, I highly recommend nerding out on Hӧrst’s website trainingforclimbing.com or getting your hands on his book Training for Climbing: The Definitive Guide to Improving Your Performance.
In the meantime, set some good intentions to work all of this new found grip strength knowledge into your climbing routine and then check out our article on grip strength testers. I did all the research for you so that your best for you grip strength tester can be purchased through our links and you can get that rush that only comes from seeing where you started and how far you’ve come!
Soon you’ll not only by crushing our made for rock climbing women hangboard workout but also floating up those routes you never thought possible!
Subscribe to our awesome newsletter below and get the answers and inspiration you’re looking for to go out and crush!
Jenny Nichols got her climbing start in Flagstaff, AZ in 2007. Today she lives in Seattle, WA where she works as a K-12 teacher. While she also dabbles in mountain biking, hiking, and kayaking, her passion is to combine climbing and international travel. To date she has climbed in thirteen different countries. She’s currently also learning how to woman a sailboat.