
Do you ever get frustrated that you just can’t hold on any longer when you are climbing? Or look at those tiny crimpers and think “How do I improve my grip strength to the point where I can actually use those?” You are most certainly not alone in those thoughts.
One way to improve grip strength at home or in the gym is to incorporate grip strength exercises such as wrist curls, plate pinches, and farmer’s walks. Your hand strength, however, is going to depend on more than just trying to lift heavier weights.
Stronger grip over time is also going to require that you commit to warming up and injury prevention. Hand and wrist injuries can set your climbing goals back months, reducing a strong grip to unusable in the blink of an eye.
You’re going to start the process of warming up with some kind of light cardio before you move on to some light to firm sports massage, and then light stretches.
Notice I repeated the word light three times in that sentence. You are not looking to max yourself out at any point in this sequence. You don’t want to be fatigued from your warm-up and you also don’t want to overstretch a muscle before you ask it to perform. Think slow and gradual.
On the continuum of dynamic to static stretching, you will be leaning more towards the dynamic end in that you will often hold a stretch for just 10 seconds on the first round and 20 to 30 seconds on the second.
Begin by completing 5-15 minutes of a low intensity exercise of your choice. You are aiming to get your heart rate up and break out into a light sweat, just a glisten if you will. If you are at the gym, maybe you hop on a stationary bike, stair stepper, elliptical, or treadmill.
Other options could include a series of jumping jacks followed by burpees, push ups, and/or lunges. Outside, your approach hike is frequently sufficient to check this box.
Once you get your blood circulating through your muscles, take a few moments to enjoy a bit of sports massage with these three muscle release options.
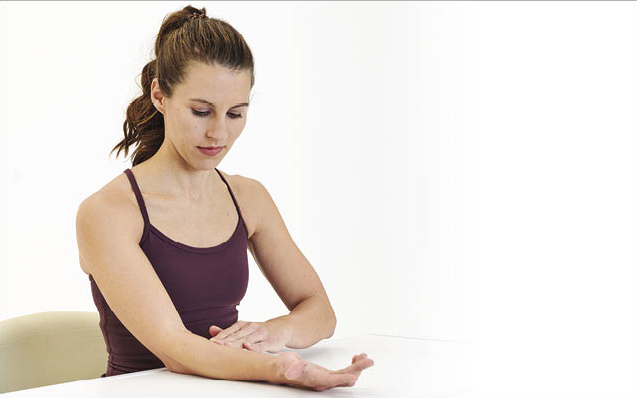
- Inner Forearm “Pin and Stretch” Release

Image Source Feel around each of your inner forearm muscles, beginning near the elbow and looking for sore spots. When you find a sore spot, apply a constant and even pressure with your thumb for about 30 seconds.
Then you are going to “pin” the spot with your thumb, make a fist, and flex your wrist back and forth, applying increasing pressure throughout the range of this movement.
- Pectoral Release
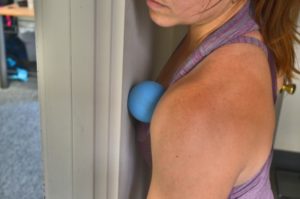
Image Source Grab a tennis ball or lacrosse ball (depending on your level of masochism) and find a door jamb or column. Place the ball between your pectoral muscle and the door jamb. If you’re not exactly sure where your pectoral muscle spot is located, roll around on the ball in the space on your upper chest between your midline and shoulder until you find a tight spot.
Hang out there until you feel the tightness relax. Don’t forget to breathe!
- Arm and Shoulder Ball Massage
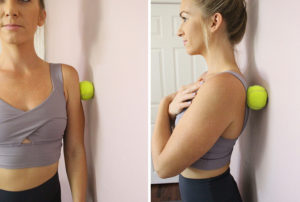
Image Source While you’ve got the ball out, do the same for your outer forearms and shoulder caps by placing the ball between you and the wall and rolling it around until you find more tight spots to release.


Now it’s time to move on to the stretching.
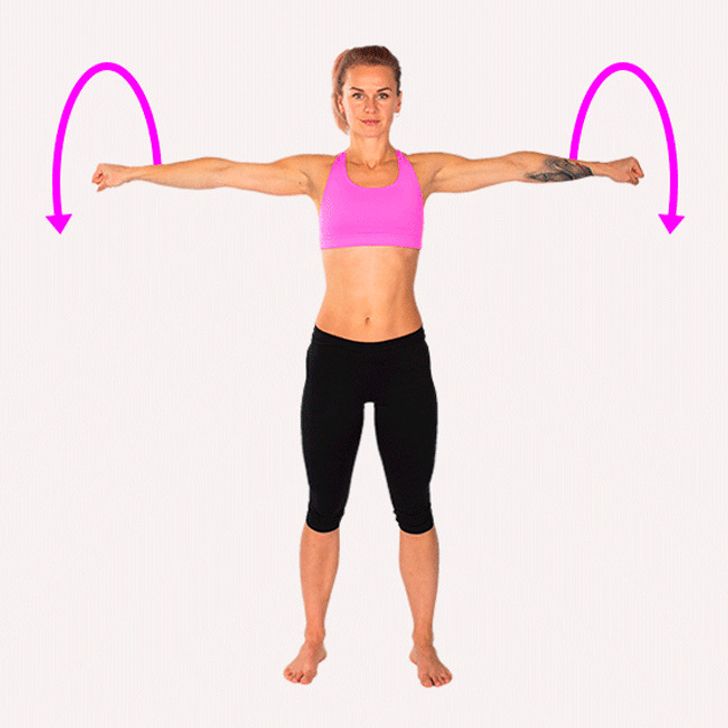
- Arm Circles
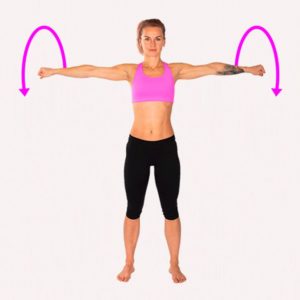
Image Source Stand with your feet shoulder width apart and your arms out to your sides in a “T” shape. Using smooth and controlled movement, move your arms in small circles and gradually widen the size of the circle until you feel a mild tension. Do not go past this point of tension. Complete about 20 arm circles.
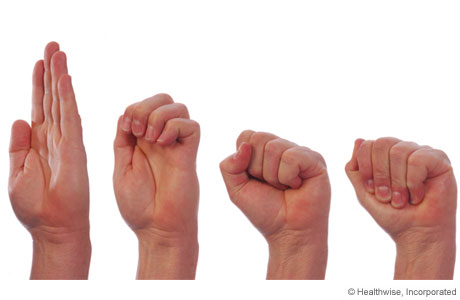
- Tendon Glide
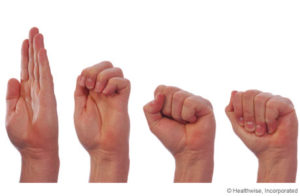
Image Source Progress through this series of glides by starting with your fingers and thumb aligned together in a straight hand position. Make a hook shape with your fingers by bringing your finger pads down to the top base of your palm.
Finally, move through to a fist shape after extending fingers toward the bottom of your palm. Complete 10 repetitions on each side.
- Finger Curls and (more) Massage
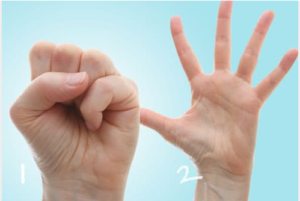
Image Source Make loose fists at your side and then flick your fingers out into an extended position. Complete 30 to 40 repetitions at a pace of about 2 per second and then follow with a few minutes of finger massage.
- Finger Isolation Stretch
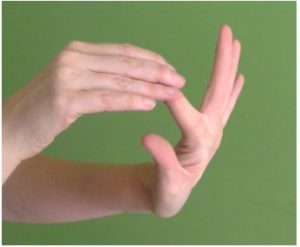
Image Source Bring your left hand back into that loose fist position, with your palm facing up at about chest level. Beginning with your index finger, use the index finger of your right hand to hook your two finger pads. Now brace your finger by placing your right thumb underneath and just above the knuckle.
Create mild tension on your joints by trying to close the index finger of your left hand while simultaneously pushing it away from your palm. Do this twice for each finger on each hand, holding the stretch for 10 seconds.
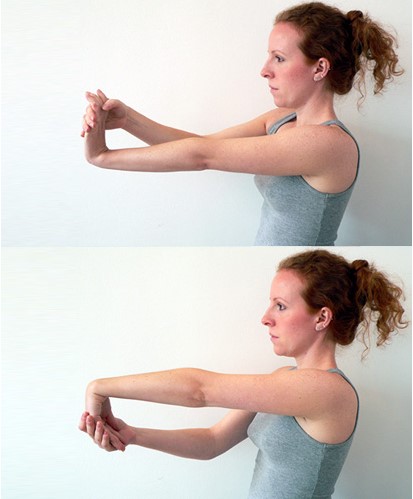
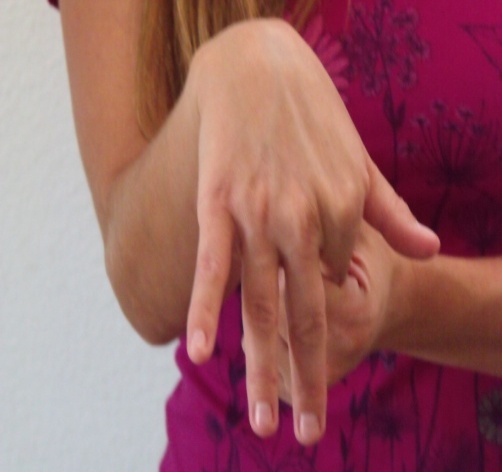
- Forearm Stretch

Image Source While standing, place the fingers of your left hand into the palm of your right hand. Your left arm is straight with your palm facing down and your thumb pointing inward. Pull back on the fingers with your right hand until you feel a mild stretch. Hold for 10 seconds.
Rotate your left hand 180 degrees so that your palm is facing down and pull back toward your body for another 10 seconds. Repeat for your right hand.
- Finger Extensors

Image Source Working towards straight arms, cross your wrists in front of your body and interlace your fingers, palm to palm. Alternate pulling on one hand to flex the wrist and of the other until you feel a stretch, hold for 10 to 20 seconds in each direction. Swap your grip and repeat.
- Across the Body Shoulder Stretch

Image Source You’ll probably remember this stretch from your PE years. Bring your left arm across your chest toward the opposite shoulder. While maintaining a shoulders back posture and a 90 degree bend in the left elbow, grasp the left arm with your right and pull until you feel the stretch.
Hold for 10 seconds before changing sides and then repeat on both sides for another 20 seconds.
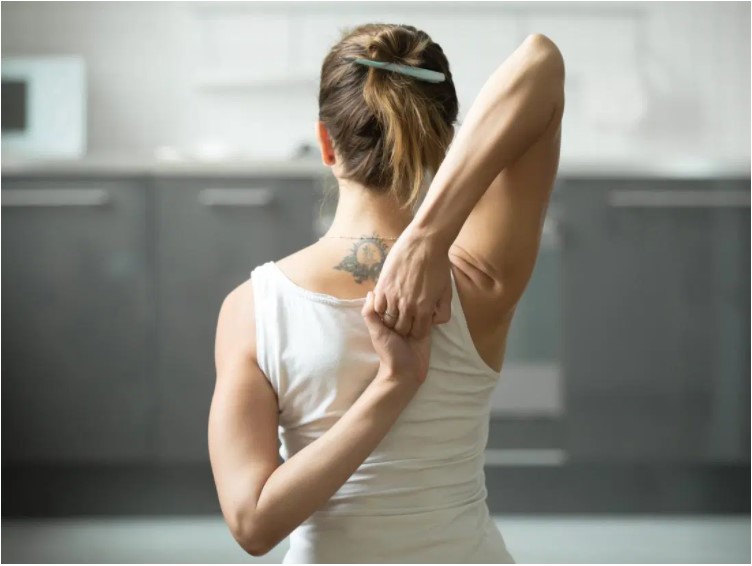
- Rotator Cuff Stretch

Image Source Grasp one end of a towel with your left hand and hold it behind your head with your elbow pointing up towards the ceiling. With your right palm facing outward, get a good grip on the towel behind your back. Pull up on the towel until you feel a light stretch and then hold for 10 to 20 seconds, three of four times on each side.
- Shoulder, Chest, and Biceps Stretch
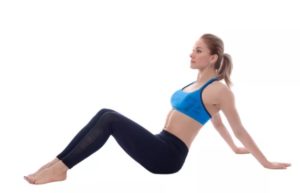
Image Source Take a seat on the ground, with feet flat and knees bent. Place your palms on the ground just behind your hips with fingers pointing away from you. Keep your shoulders back and think about extending your spine straight while radiating from your heart.
Slowly walk your hands back until you feel tension in your shoulders, pecs, and biceps. Hold for 20 seconds. Go deep in the stretch if you would like and hold for another 20 to 30 seconds.
- Behind the Head Shoulder Stretch

Image Source Stand with arms extended above your head. Bend your left elbow at a 90 degree angle behind your head and grasp it with your right hand, pulling on it to gain a stretch in the back of your upper arm. Hold for 10 seconds before changing sides. Repeat again on both sides for another 20 seconds.


The final step in your warm-up process will be to get on some climbs well below your max grade to slowly begin activating your muscles, joints, and tendons before you push them to their limits of performance. Again, the focus should be on keeping it easy. Like with dynamic stretching, you are asking your body to begin to mimic the harder moves ahead.
New and experienced climbers alike can reap the benefits of warming up. We all want to climb harder and stay healthy so we can keep climbing. Warming up also has the added bonus of giving us time and space before we start working our projects to get our minds focused while we also prepare our bodies.
Consistently combining your warm up with grip strength exercises and a progressive hang board series, which can be purchased through our link, will definitely be a key component of sticking those hard moves and staying on the wall.
Subscribe to our awesome newsletter below and get the answers and inspiration you’re looking for to go out and crush!
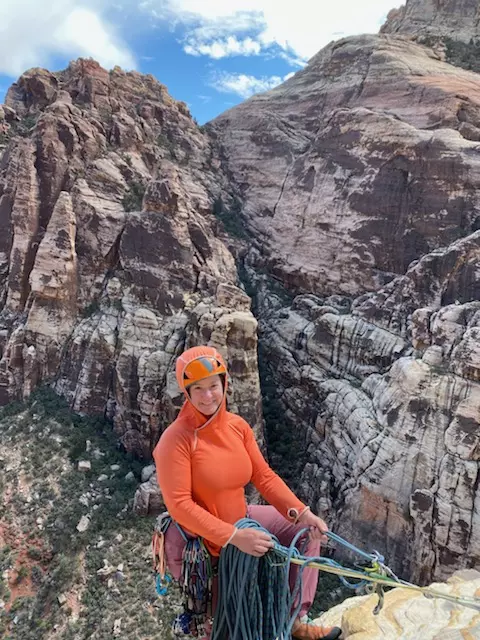
Jenny Nichols got her climbing start in Flagstaff, AZ in 2007. Today she lives in Seattle, WA where she works as a K-12 teacher. While she also dabbles in mountain biking, hiking, and kayaking, her passion is to combine climbing and international travel. To date she has climbed in thirteen different countries. She’s currently also learning how to woman a sailboat.